Search This Blog

Showing posts with label Rice Cereal Treats. Show all posts

Tuesday, August 16, 2011

Heart Krispie and Cupcakes for my Sister's Engagement!

My sister got engaged at the beginning of August!  Our entire family is thrilled.  This exciting news was a good excuse for me to make time to bake!

When my sister and her fiancĂ©e came over to share the excitement with the family, I made a Rice Krispie heart.  To model rice cereal treats into any shape, cover with saran wrap and roll out with a rolling pin.  Place hands over saran to soften edges and form into desired shape. Sprinkle with candy or jimmies to add a little crunch, and then add a message with buttercream icing. This message had to be in turquoise, since it is my sister's favourite color. 

I always suggest cutting rice cereal treats as soon as you make them.  This avoids difficulty later on and makes it easy to serve. All of the sticky marshmallows make it difficult to cut when it cools, as you can see for the expression on my sister's face!

Looks like I got approval from the groom to be. Thanks David! (He's easy...he likes all of my treats!)

My mom helped me bake these cupcakes that I brought to a Family Toast over the weekend.  To create this turquoise buttercream, I added about a half a teaspoon of Wilton teal icing color to buttercream icing. I used Wilton Tip 32 to decorate the cupcakes above.

To decorate these cupcakes I used Wilton tip 22.  I began by piping individual stars to form a circle around the border of each cupcake and continued to fill in the middle until no more cake was showing.

These cupcakes were "sweet!" Most importantly, Adrienne loved them!
Stay tuned for more "engagement/shower/wedding treats" throughout the year. 
It looks like there will be a number of celebrations!

Mazel Tov Adrienne and David!

Sunday, July 4, 2010

Rice Krispy Birthday Cake


My aunt is always so busy making dinner and dessert for everyone else's birthdays, so for her birthday, I decided to whip something together in no time at all.  For all of you who really want to make a cake but feel that it is too difficult, here is the perfect idea...a Rice Krispy Cake!

Generously spray a spring form pan with non stick cooking spray. Prepare the Rice Krispy cereal mix as you would to make Rice Krispy Squares.  Click here for the recipe.

While mixture is still warm, pour into the spring form pan.  Using a buttered spatula or buttered hands, press mixture evenly and add sprinkles for additional colour.  Let set and cool. 

In the meanwhile, roll out some fondant and use alphabet cookie cutters to cut out a happy birthday wish.
Once the cake cools, arrange the letters on the cake and use chocolate frosting as glue to set the skittles in place.

Mmmm....I love skittles!
Transfer to a plate and serve!
For guaranteed freshness, eat the same day.

Sunday, May 16, 2010

Montreal Canadiens Rice Krispy Jerseys

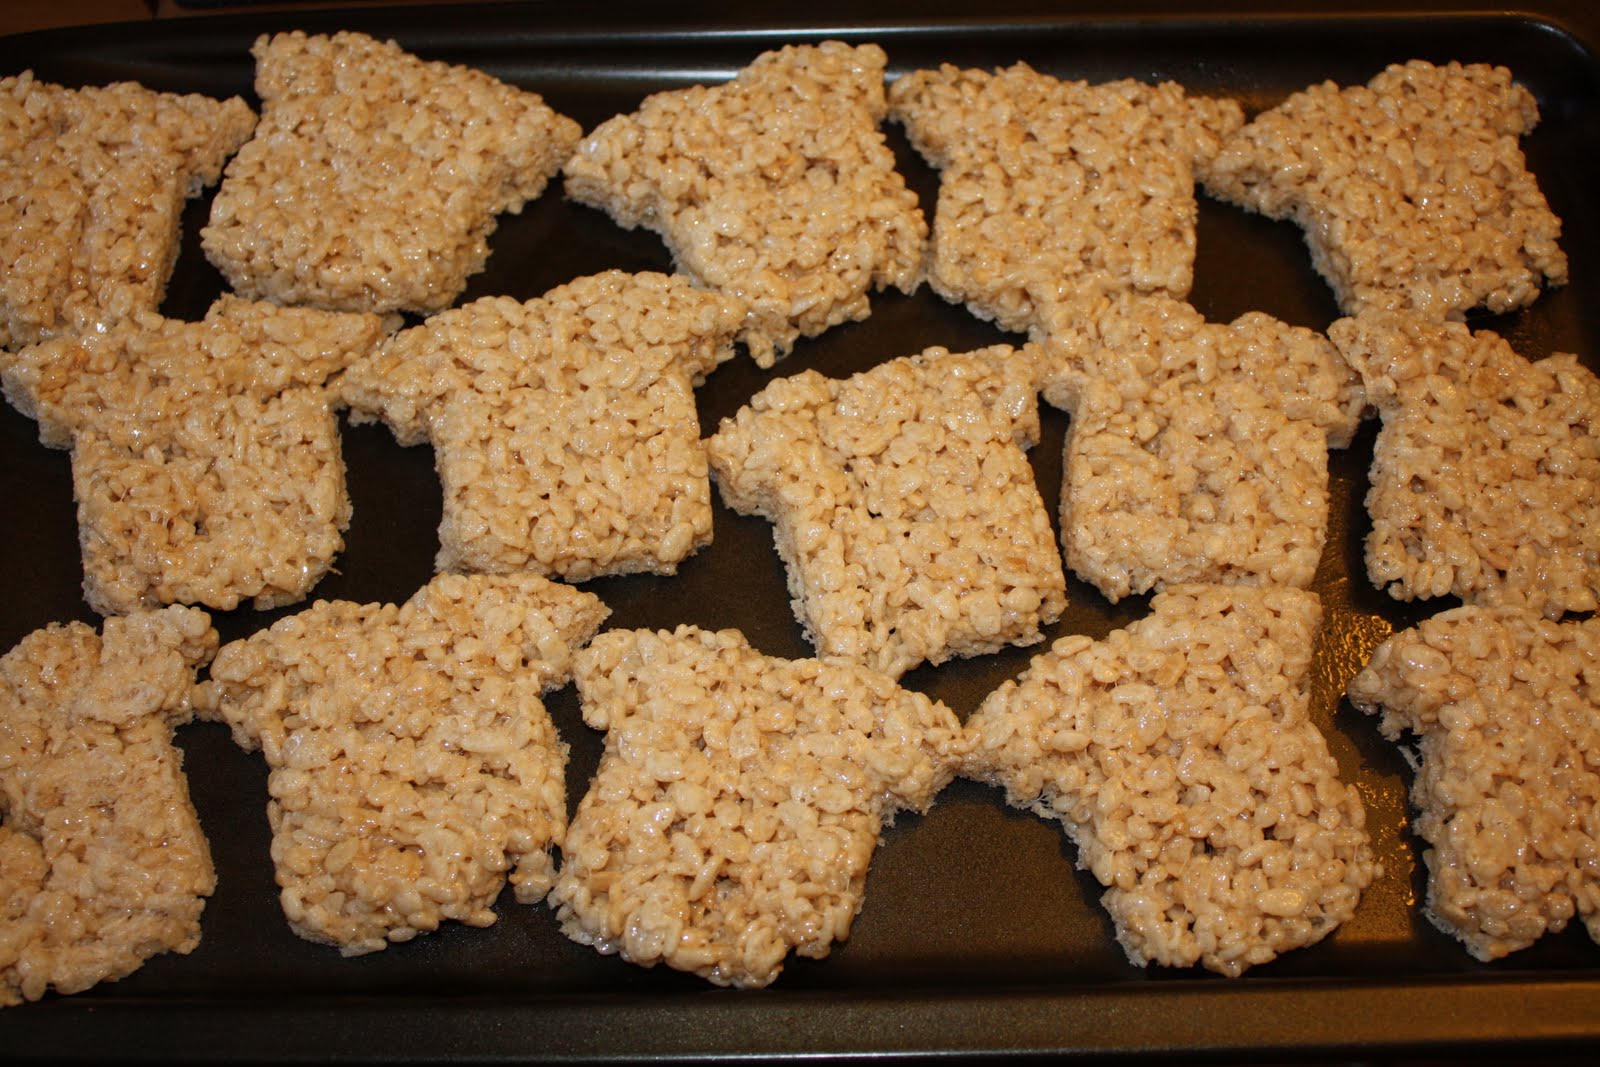
This was another one of the desserts that I made for Rich's birthday. Montreal Canadiens jerseys made out of rice krispy treats as the base, rolled fondant for the jerseys and the blue stripes, and buttercream icing for the names and numbers of the team members. 

Planning ahead is always important. Of course the site that I chose, although for the most part was accurate, included Koivu as a member of the team. I was quickly reminded by Rich's friends that he is no longer a member of the Montreal Canadiens. Whoops!  Let's just call him an honorary member for this post! At least I spelled all of the names correctly and got all of the numbers correct!

First things first, I made the delicious, ooey, gooey rice krispy treats! I used a greased cookie sheet to lay out the mixture. When making rice krispy treats cover the treats with saran wrap and use a rolling pin to flatten the treats over the saran. This spreads out the rice krispies and allows for the tops to be evened out, without sticking to the rolling pin. The flat surface makes it much easier to write on and lay the fondant overtop.

Use a greased cookie cutter to cut out desired shapes.  I was amazed by all of the ideas I found on the Rice Krispies website. However, it was next to impossible to find a t-shirt or a jersey cookie cutter in this city.  Therefore, I used a onesie cutter and cut off the bottom part to make a t-shirt.

One batch of the recipe made about 15 jerseys.

 Roll out the fondant and follow the same method to cut out the shirts.

It is customary to use buttercream icing as glue for the fondant to stick to the jerseys.  However, since they are so sweet and sticky to begin with, I skipped that step and stuck the shirts directly onto the rice krispy jerseys.

Next, use a paint brush to paint the back of each blue stripe with water to stick to the shirt.

Since I had leftover buttercream icing from the cake I used it to pipe the names and numbers onto the jerseys.  However, royal icing might have been more effective for this purpose.

Aren't these adorable?

Go Habs!

You rock!

Obviously the boys agree!

Saturday, March 20, 2010

Candy Sushi with Riley


She may just be the most beautiful 3 year old I know, (okay, I might a little biased since she is the daughter of one of my best friends), but, Riley was the best helper and made some sweet and delicious candy sushi with Carly, her mom Julia, and I, last week. 

Since many of my friends and I are teachers, March Break is a great time to spend time together and hang out. When Carly mentioned that she made candy sushi with her sister and that she also recently made it at a bridal shower, I thought it would be the most perfect blog post for Riley to help us with!  My girlfriend Julia, (Riley's mom), was also very excited!  All in all, it was a great morning spent together! 

Just look at that look on Riley's face as she gathered all of the candy that would be used to make the candy sushi!

For the base of the roll, we used fruit by the foot.  Cut one roll into four even pieces and layer to form a square. For the sushi rice, we used Rice Krispies Treats cut in half and flattened.

Select any candy of your choice for the filling (longer items work best). 
Some possibilities might include:
-kit kat
-gummy worms
-licorice
-nibs
-chocolate covered fingers

Cut 2 Rice Krispies Treats in half, horizontally.  Flatten out all four pieces.
Look at those little hands at work!

Lay overtop of fruit by the foot "mat."  Choose a filling. 

Roll it up Riley!  So focussed and so hard at work!
What a great job!

Onto the next type of "shushi" as she called it! 
She loved adding the fondant rectangles to the top of the "rice." 

The best part...dipping the sushi into the chocolate sauce.

"Shhhh...don't tell anyone that I ate a piece of shushi before lunch!"

How could anyone resist!

Mmm...all packed up and ready for takeout.


Without even planning it, the Nib filled rolls looked like happy faces!

SMILE!
Enjoy!

Sunday, October 4, 2009

Rice Krispy Treats with a Twist


Who says that the simplest desserts can't be made into delicious bites of sweetness with a little twist!

Pictured below are the ingredients you will need:

First, generously spray any fun shaped baking pans, muffin tins and/or a cookie sheet lined with waxed paper with non stick cooking spray.


Next, melt 1/4 cup of butter or margarine (I like butter better, but I used margarine for those who couldn't have butter) in a pot over low-medium heat. Add a 250 gram package (about 5 cups) of miniature marshmallows and stir with wooden spoon until all marshmallows are completely melted. I prefer to use mini marshmallows because they melt a lot faster than the larger sized ones. However, if you only have large marshmallows about 40 will do! (If you are a chocolate lover and wanted to make chocolate Rice Krispy Squares, this would be the time to add in as many chocolate chips as you like and let them melt, before adding the Rice Krispies.)
Once all of the marshmallows are melted, mix in 1/2 teaspoon of vanilla. Remove pot from burner and add 6 cups of Kellogg's Rice Krispies cereal. Stir until well coated.

Using a buttered spatula, press mix into fun baking trays and pour onto cookie sheet lined with waxed paper. Use any shaped cookie cutters you have to cut out shapes while mixture remains hot and easy to handle.

Let cool and set for about 20 minutes.

Here's where the fun part begins! Time to decorate!

Melt 1/4 cup of Hershey's Chipits in a bowl for 30 second intervals until completely melted.


Spoon melted chocolate into the corner of a ziploc bag, cut a hole and pipe onto Rice Krispy treats.
Repeat with white chocolate chips.
Mmmm...Mmmmm...Good!

Roll Rice Krispy Treats from mini muffin tins in plates of candy toppers and different sprinkles. They add a nice sweetness and a crunch to the dessert.
So colourful!
Pack away and carry to destination!

Arrange on plates and serve.


Enjoy!
Special thanks to my sister, Adrienne for being the handmodel and my personal assistant in this post. And, to my cousin Richard, for teaching me some useful tips about my camera!