Search This Blog

Sunday, December 26, 2010

Mom's 60th Birthday Cake

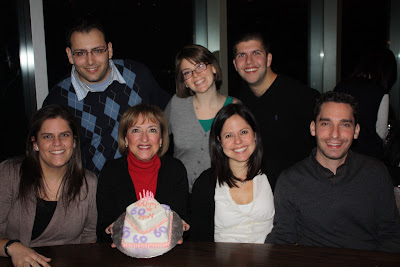
My mom turned 60 last week! This called for an extra special dessert. I experimented with some my newer square cake pans that I have used only a handful of times and continued to practice working with fondant. After this project, my cake decorating skills have slightly improved. I still have a long way to go!

Here's the play by play. I lined each cake pan with parchment paper and filled each with white cake batter.

I knew the cakes were ready when I inserted a toothpick and it cake out clean.  The cakes also turned a golden brown colour. After they cooled, I covered the cakes with plastic wrap and set them in the fridge overnight.

The next day, I began by cutting off the top part of each cake to create a levelled surface. 

I also cut each cake in half. This is what the cakes looked like before they were iced.

Using an offset spatula, I spread a layer of icing onto the bottom half of each cake.  I placed the top tier on top so each cake looked like a sandwich.

I then "dirty iced" each cake and placed them both into the fridge to set while I prepared the fondant.

On a clean, flat surface, I spread out a fair bit of icing sugar and rolled out the fondant.

I used my newest kitchen gadget!  The Wilton Pastry Wheel. It serves two purposes; using the wheel on the left creates scalloped edges and using the wheel on the right creates straight edges.

After I secured the fondant to the cake, I used the straight edge cutter to remove the extra fondant.  If you do not have a pastry wheel, a pizza roller could easily be substituted.

I added some icing to the base of the cake plate as well as to the bottom of the samller tier so the cakes would stay in place.

Since these cakes were quite small, I didn't feel that I needed to use dowels as a support system. I stacked the smaller cake on an angle on top of the larger cake. I also wasn't too worried about the gap between the fondant and the cake plate since I knew that I could hide it by piping butter cream icing around the base of both tiers.

There I went, piping away! The cake was finally starting to take shape.

Next, I added some purple food gel to the white fondant. By mixing the two together, the fondant takes on the color purple. After I rolled it out, I used number cutters to cut out the number "60" repeatedly for different sides of the cake.

I used a paint brush and a little bit of water to adhere the 60s to the cake. (Fondant sticks to fondant easily with the addition of a little water.)

Then, I carefully placed each 60 on different areas of the cake.

Tada...this is what the final product looked like!

Happy Birthday Mommy!

Wednesday, December 22, 2010

Christmas Party Cookies

Merry Christmas! 
I wonder if a new purse or a fancy pair of shoes is on your wish list.

I couldn't help but buy this adorable set of Fashionista Cookie Cutters from Kitchen Stuff Plus a few weeks ago. I only used two of the five cutters that come in the set, but I just love them!  They are perfect for a shoe-a-holic like me, and I'm sure, like many of you too!

I baked these cookies just in time to be inspired by Marion, from Sweetopia.  Her post on Diva Claus Decorated Cookies was great! Her decorated cookies and designs are always fabulous. 

I have to admit...for these cookies, I did use my own white royal icing, but the red and green icing was leftover from gingerbread house making. I was not too impressed with the quality of the pre-made red and green icing, so these designs are certainly not my best. Nonetheless, I still think the cookies are pretty darn cute!

How about this duo for your Christmas Party?  I would actually wear these shoes...if they came in my size!

Or these?

Not too sure about this combo...but it's still cute!

I love, love, love, shoes!

So tell me...how many pairs of shoes and/or purses do you have hangin' around in your closet?

For the recipe I use to make sugar cookies, click here.
To make these cookies even more festive you could make and decorate gingerbread cookies.
For the recipe I use to make royal icing, click here.
To learn how create feathered stripes of wet flood, click here.

Happy Holidays!

Monday, December 20, 2010

Christmas Tree Cookies

Merry Christmas!

I made these cookies a few weeks ago for some gifts for the holidays, using my new tree cutter. Just pipe.
And flood...
For the recipe that I use to make royal icing, click here.
To decorate the trees, be as creative as you like with candy and sprinkles! To adhere the silver dragees, I used tweezers to immediately place each one onto the wet flood. The flooded icing acts as glue to hold the candies in place. For the larger candy balls, I used my hands to place each one.

To package these gifts, I bought some silver cookie containers and styrofoam balls. First, I wrapped the ball in green tissue paper and poked a reindeer cake pop into the middle. To learn how to make Reindeer Cake Pops, click here.

Next, I leaned three cookies against the stick of the cake pop.

Finally, I wrapped each package in clear cellophane.
My gifts were complete.
Merry Christmas!

Friday, December 17, 2010

Unique Gingerbread Houses (made by my Grade 6 students)

My students had a blast this morning, constructing and designing their own gingerbread houses.

They used lots of these...

And I pre-made many of these.

And there was no shortage of these!

But only two groups won these...

Check out how great all of their houses turned out.

So colorful.

This one was definitely the sturdiest.


I loved the detail added to both of these ones.

Loved this one!

This was the winning house, voted by the kids as their most favourite.

Check out the car made out of gummies.  Isn't it adorable?!

Great job grade 6's! 
Happy Holidays!