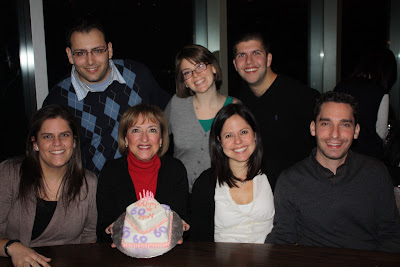
My mom turned 60 last week! This called for an extra special dessert. I experimented with some my newer square cake pans that I have used only a handful of times and continued to practice working with fondant. After this project, my cake decorating skills have slightly improved. I still have a long way to go!
Here's the play by play. I lined each cake pan with parchment paper and filled each with white cake batter.
I knew the cakes were ready when I inserted a toothpick and it cake out clean. The cakes also turned a golden brown colour. After they cooled, I covered the cakes with plastic wrap and set them in the fridge overnight.
The next day, I began by cutting off the top part of each cake to create a levelled surface.
I also cut each cake in half. This is what the cakes looked like before they were iced.
Using an offset spatula, I spread a layer of icing onto the bottom half of each cake. I placed the top tier on top so each cake looked like a sandwich.
I then "dirty iced" each cake and placed them both into the fridge to set while I prepared the fondant .
.
On a clean, flat surface, I spread out a fair bit of icing sugar and rolled out the fondant.
I used my newest kitchen gadget! The Wilton Pastry Wheel . It serves two purposes; using the wheel on the left creates scalloped edges and using the wheel on the right creates straight edges.
After I secured the fondant to the cake, I used the straight edge cutter to remove the extra fondant. If you do not have a pastry wheel, a pizza roller could easily be substituted.
I added some icing to the base of the cake plate as well as to the bottom of the samller tier so the cakes would stay in place.
Since these cakes were quite small, I didn't feel that I needed to use dowels as a support system. I stacked the smaller cake on an angle on top of the larger cake. I also wasn't too worried about the gap between the fondant and the cake plate since I knew that I could hide it by piping butter cream icing around the base of both tiers.
There I went, piping away! The cake was finally starting to take shape.
Next, I added some purple food gel to the white fondant. By mixing the two together, the fondant takes on the color purple. After I rolled it out, I used number cutters to cut out the number "60" repeatedly for different sides of the cake.
I used a paint brush and a little bit of water to adhere the 60s to the cake. (Fondant sticks to fondant easily with the addition of a little water.)
Then, I carefully placed each 60 on different areas of the cake.
Tada...this is what the final product looked like!
Happy Birthday Mommy!


Beautiful Mel. Hope you all had a great time celebrating!!!
ReplyDeleteI think you did a great job! Any mother would be proud!
ReplyDeleteLove this cake ~ and your step by step tutorial is wonderful.
ReplyDeleteYour Mom must have been delighted with her birthday cake. Belated best wishes to her. You did a great job with the fondant!
ReplyDeleteMelissa,
ReplyDeleteI love your work and I need to buy some things from you! Do you take orders? Pls email karen.moores@gmail.com
I happened upon your blog while looking at Bakerella's blog/website. I too am a cake decorator, self taught. A tip I just learned for fondant was to get a large coffee can or sturdy type cylinder. Place the coffee can on the counter and put the cake on the coffee can. Then drape your fondant over the cake. The fondant will naturally hang over the sides and create beautiful and perfect corners/ sides. Gently smooth down each side as you normally would. Gently place the cake back on the counter and cut the excess off with a pizza cutter. :)
ReplyDeleteThanks for the tip Shannon!
ReplyDelete